Showing posts with label crafts. Show all posts

Monday, 8 April 2013

Ways to display children's artwork


I feel that it is really important to display children's artwork wherever possible in the house.  Little Boo loves it when I put her artwork up for everyone to see.  Today I am going to share a few ways that I display or keep Little Boos artwork.  There are a few that are repeated from a previous post but I feel that it is always good to recap some posts so they can be seen again.

Hang pictures up 


Make a canvas 

Make a scrapbook


Do a power-point presentation

I know that some art work is difficult to keep especially if it is really big! therefore it may be a good idea to take pictures of some of the items and make this into a power point presentation or a video.  The great thing about this is that it does not take up a lot of room and you can really make it special adding in text and music.  You could always make this together as well.

Frame it!

Having a few picture frames in the house that are saved for children's art work I feel is a great idea.  The good thing about this is that it can be changed throughout the year. Box frames are really good as you can put in 3D items and collages.

Make a calender


This year we decided to make a calender from Little Boos artwork this is so simple to do and saves money as well.

If there are any other ways that you use to display children's artwork please comment below.  I would love to read about new ideas.

Thursday, 4 April 2013

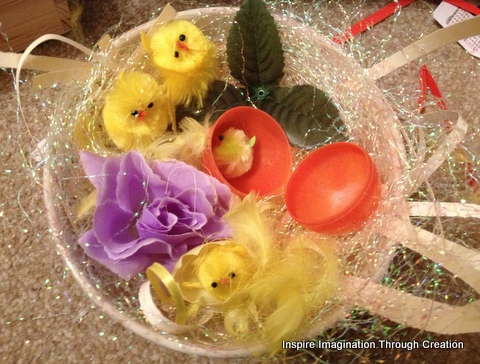
Our very easy pom pom chicks


These pom pom chicks are so cute and really easy to make as well!! All you need to do to make the pom poms is to wrap wool around a fork then tie it off.  You then take it off the fork and cut the wool on the sides to make the pom pom.


All is left to do is to decorate it! 


Linked up to See Vanessa Craft

Tuesday, 2 April 2013

Egg Carton Wreath


I am delighted that my first guest post has been posted on the Twinkl Blog today.  I have written all about cheap spring craft ideas that can be made including this beautiful spring wreath  made with egg boxes! 
Linked up to

Linked up to Sarah Hurley 365 challenge 

Monday, 1 April 2013

Up-cycle egg box


Lately I have been looking for inspiration to use more of what we have around the house to make our crafts with limited funds it is essential that a lot of the crafts that we do are not too costly.  I had a few egg boxes and decided to make paper mache with them.  I was really surprised at the results as the mache was really easy to use and felt lovely.  Little Boo was a bit apprehensive at first as this was a new material but she soon liked it. 


To make the egg box mache it was a complete trial 
We tore up the box into small pieces and soaked over night in a warm bowl of water.  
In the morning we sieved out the water leaving the mixture a little bit damp.  
Then transferred this into a jug and used the hand held blender to make the mixture finer. 
After this I added two tablespoons of salt (this is added to preserve it) 
Add PVA glue.

The mixture was great for pushing into cookie cutters to make shapes.  We placed them on the side to dry then the day after placed them on the radiator (as I was getting inpatient). 


They dried really well so we decided to paint them. I did sand them down a bit before painting. I completely forgot about placing holes in these as they could of been hung up! so instead I am going to add magnets to the back. 


I have shared this idea on
We Made That

Wednesday, 27 March 2013

Plastic Egg ideas


With the lead up to Easter loads of places are selling plastic eggs and they are great to use for activities and to craft with here are some of the things that we have done with our eggs. These eggs after Easter usually go into the sale but I feel they can be used all year round. 


Catching eggs in the bath is a great game Little Boo caught certain colours.  Then she enjoyed using the eggs to pour the water from egg to egg. 


There are loads of home made play dough ideas out there and the plastic eggs make such a great container for   it. If you decorate the egg it would look even more personalised! Add a few play dough cutters in the egg box as well to make it more fun.  This is a great idea for children who can not eat chocolate or for those that you want another idea for.


Making these shakers is such an easy idea all you need to do is find various different items around the house and add them to the eggs.  We used rice, beads, buttons, pasta, cut up straws. 


Glow in the dark Easter Egg hunt is such good fun! All we did was add some glow sticks into the eggs. 


Add letters or numbers into the eggs and attempt to find the right one. Little Boo started to use the eggs with the Play dough then we decided to use them as molds to make our own Play dough eggs.


Little Boo loves Humpty Dumpty so we decided to make Humpty Dumpty and Mrs Humpty Dumpty.  You can still open these so they would be great to store some little Easter treats!


We used the plastic eggs as molds to make our salt dough eggs.  We cooked these using the microwave and our three minute salt dough recipe.  That meant they were ready really quick so we could paint them :)  


This last idea is the one that Little Boo enjoyed the most! Using the eggs to make nests for the chicks and making our own Easter trays. 


I hope that these ideas come in helpful in the lead up to Easter and after! 

Tuesday, 26 March 2013

Learning Shapes- Decorating a felt Easter Egg


I thought that I would share this with you a great way to learn shapes and decorate an Easter Egg at the same time.  It is so simple to make just cut out some felt eggs and shapes then all is left is to decorate! We talked about the shapes that Little Boo was using and the colours that they are.  We have the big, medium and little egg so this meant there was lots of discussion about their sizes.  I asked Boo to put different amounts of the shapes onto the eggs so this meant she was practising counting as well. I decided to add in some wool and scissors so Boo could cut up some wool to use as well. Lots of potential with this simple activity.


Sunday, 10 March 2013

Making a Nursery scrapbook


Little Boo started nursery  a few weeks ago. She has been bringing back some of her crafts that she has completed, then this week she also brought home a star of the week certificate! This got me thinking that we needed somewhere to keep all these safe. This is where the idea of the scrapbook came in. I just cut up some foam board that we had (you could use a cardboard box, I did not have any of this card to hand) then  Little Boo decorated this. I cut up the letters for her which were stuck on when she finished.

When it was dry we placed the sticky contact over it so all the pieces stayed on. I then added come holes and book rings that I had in. If you have not got book rings ribbon would work. We will now just keep on adding all the work that Little Boo brings home.  My hope is that it will reinforce a positive attitude towards going to nursery as she can look at all the great activities that she does as well as seeing how Little Boo progresses.

Hope this idea comes in helpful.

Sunday, 17 February 2013

The ABC cafe


I found this wonderful printable called ABC Cafe  it is fantastic Little Boo spent ages playing.  The idea is that the customers make their orders by all having letters which represent the food they want to order.  The printable then has foods which begin with each letter of the alphabet so all you do is match the correct food to the letter of their order or vice versa. Little Boo wrote down their orders, then had fun finding the correct food.


To help her I placed a choice of three foods for her to match as having all the foods was a bit overwhelming. As you can see from the picture we used Little Boo's Dolls to play but the printable does provide customers as well! We had about three tables in the end.  Hope that you find this idea fun.  I love it when I find something for free.

Tuesday, 12 February 2013

Reduce Food waste and save money


Over the past few months I have been trying to reduce the food wasted in the house.  As well as being a massive waste of money I hate to see food thrown away! Love food hate waste stated that
"We throw away 7.2 million tonnes of food and drink from our homes every year"  It is actually very shocking when you look at the table to see how much money this equals to.

Due to this I have started to write down or at least be more mindful of what we are eating and need to eat each week.

I have also started to freeze home made meals meaning we have our own ready meals ready and waiting.

One recipe that I have been doing for ages is banana bread/muffins this is a great way to use up bananas that are over ripe and that may be thrown away. It is a great recipe to make with Little ones Little Boo loves mashing the bananas!


The best recipe that I have found is this one I just omitted the Walnuts.  I made this into muffins so it took 25 Minutes to cook.  Once they had cooled I was able to freeze some for another day.


Monday, 11 February 2013

Numbers and Letters Box


A few months ago we sorted out all Little Boos toys and placed them into categories. Sad, I know but this has really helped me with our day to day activities. I know if she wants to play at fancy dress that the box is ready and waiting we also have ones for sticker/colouring books, play food and dolly things .  I just wish that all my stuff was this organised! Anyway, I wanted to share with you what we have in the Numbers and Letters box.  This is used to inspire Little Boo with numbers, letters and colours.

In the box we have things that we have collected over time such as free toys from magazines.  These we use as a matching activity or to count.

Buttons can be used for a multitude of things counting, sorting the biggest from the smallest, sorting into colours, making patterns or counting out a set amount. More ideas are on The Activity Mom .

Pebbles these we have used to count and to place around letters. I am also going to paint/collage a few with Little Boo and place letters on them so she can spell out her name.


We have a leap frog fridge magnet alphabet set . Little Boo has had this since she was really Little in the old house we had it on our fridge and she used to play with it loads and often dance to the tune.  Unfortunately this seems out of stock at the moment but leap frog also do a Letter Factory which looks really good and the same sort of concept.

There is a large tub of colour animal counters which I got from the education show last year at a very good price.  These have been great to sort into colours and group or count them.  There is also a tub of play animals that Little Boo likes to match up and place in groups then count them.


There are some animal dominoes in the box which Little Boo is getting really good at playing. This is great to learn matching and also learning to take turns whilst playing games. The musical instruments are included as very often we play a beat then Little Boo tries to copy what I have just done.

The wooden fruits are a fantastic threading set that I brought from the education show a few years ago (again at a much cheaper price) when Little Boo was just learning to thread.  They are lovely to use and are made for younger children to practice threading we also use them to make patterns with now.

The bus is a laminated sheet from twinkle where we count the people onto the bus. I have printed some flash cards with different amounts of pennies on them as well from Twinkle.


The most important thing is to make it all FUN! and keep adding things to it as your child progresses. 


Thursday, 22 November 2012

The start of Christmas Craftiness!- Our ball ball wreath


I have decided that it is about time that I started to share with you the Christmas crafts.  Apologies to readers who do not celebrate Christmas. I have been doing lots of cooking with Little Boo just recently so have decided to post these ideas as well alongside.  This year it is brilliant as Little Boo is capable of doing so much more than last year! Her attention span has increased, she can use scissors better and even starts to suggest what we could do.  I will make sure to add in what we did last year when I open up the decorations box.

First I am sharing with you our ball ball wreath.  I saw this posted on Pinterest and just had to have a go at making it with Little Boo.  All you need to have is


  • Hot glue gun
  • 80 or so ball balls (you could upcycle some that are no longer used for the tree,this is the cheaper option, we brought ours from the £1 shop 12 for £1)
  • wire coat hanger/thick wire


First of all you need to secure the ball ball and hanger with hot glue.  I did this part of the activity whilst watching the Television (I was also procrastinating from writing my assignment, whoops). 


After this I got the wire coat hanger (thanks to my mother in law) and bended it into a circular shape.  Then it was just a case of getting Little Boo to thread the ball balls onto the hanger.


There was no specific order or anything just go for it! It really made me realise how much she has developed her fine motor skills. It was nice as we were chatting as we were doing the activity about Christmas and Santa then about the colours that we were using.  It was funny as Little Boo still has a Mommy and a Daddy one for everything! so many of the ball balls were placed on in that way one Mommy then a Daddy then the baby ones. Anyway after this, I just (well my husband actually, I am weak) twisted the coat hanger back together.


We added a ribbon at the top and there you go a wonderful wreath for your house.  Many people who make these use ball balls that have been in the family for a long time as a way of showing them off in a nicer way than putting them on the tree.  Anyway I love ours even if the ball balls were only cheap, it would also make a fantastic gift for someone at Christmas.

Tuesday, 23 October 2012

Painting with items from our nature walk


Painting with leaves


To make use of those wonderful leaves and twigs and nature walk items I decided to do some painting with Little Boo using them.  She always gets really excited when I mention painting so this was a great hit which ended up being very messy.  It does not have to be messy but Little Boo decided that she also wanted to paint herself as well!

I realised when doing printing the less paint that you have the better.  Sometimes this is difficult with Little Boo as she is always keen to blob on loads of paint. So to overcome this I put the paint on a big tray then spread it thinly and did not get out the paint brushes. This worked effectively as it enabled us to mix the colours effectively.

Painting with leaves


Instead I made our own paint brush out of a twig and dried pine needles and which was really effective and looks like a mini broomstick. This made Little Boo laugh as we are reading Room on a Broom (Julia Donaldson) at the moment and she said that she was painting with her broom.

home made paint brush with twigs and pine needles


We used all the items we collected and it was interesting to see all the different prints that could be created with them.

leaf print

We decided that we wanted to roll the conker across the page and watched as it made a paint trail.  The leaves we had worked OK but really we should have done this activity as soon as we had collected them or the day after as some were too dry to do an effective print with them.

printing with leaves


We are out tomorrow and will be collecting more leaves as I have a few more ideas to try out and want to try the leaves when they are not so dry.  I am sure that Little Boo will not mind doing some more painting!